1 Dado Set, 4 Easy Joints
Dado or groove joint
You cut these narrow channels in different directions: Dadoes go across the grain; grooves run with the grain. Not only do they add significant mechanical strength to butt joints, but also the “walls” of the dado or groove provide additional glue surface area for superior bonding.

Rabbet joint
A partial groove or dado cut along the end or edge of a workpiece, a rabbet allows you to attach a cabinet top, bottom, or back flush with the adjacent workpiece.

Here’s how: フルデドセットを取り付け、テーブルソーのフェンスに補助リップフェンスを固定します。 刃をテーブルの下に下ろし、補助フェンスを刃の上に移動させ、のこぎりの電源を入れたまま、刃をゆっくりと補助フェンスに上げて、刃の一部をフェンスに埋めます。 これで、ダドセットの幅の代わりにリップフェンスを調整することで、ラベットの幅を微調整することができます。

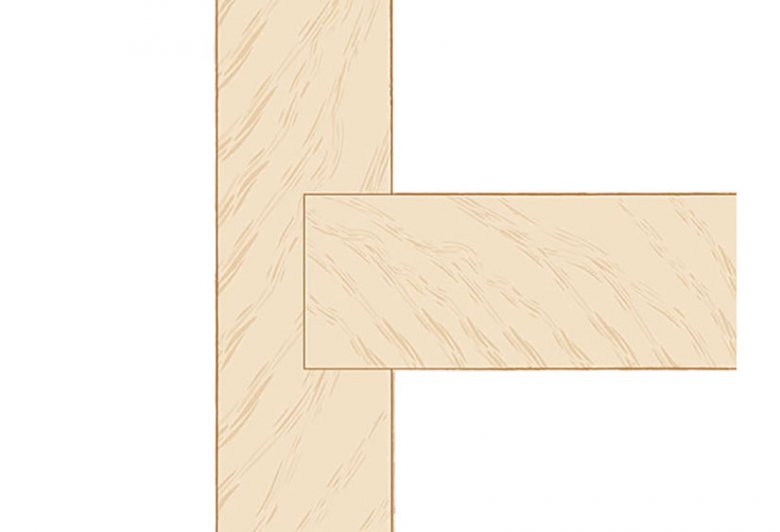
舌出しジョイント
このジョイントでは、舌出しを行います。 板厚の1/3程度の中央の舌が、隣の板の溝にはまる。 これにより、板を合わせながら強力に機械的に結合することができ、端から端までのジョイントに最適です。

ここで、方法を説明しましょう。 溝を完璧にセンタリングするために、リップフェンスを板のほぼ中央に位置するようにセットし、溝を切ります。 その後、ワークを180度回転させ、ワークの反対側の面をフェンスに当てて、もう一回切ります。 タングは、補助リップフェンスを使い、板の両端にラビットを切り、タングは少しオーバーサイズにします。 このとき、舌の部分は少し大きめに残しておく。

ハーフラップ
ミターよりはるかに強いフレームジョイントには、重なり合う 2枚の板の厚さを半分にして切断しハーフラップにして下さい。 A stacked-dado set hogs out the waste quickly and smoothly (below).

Here’s how: Set your blade depth to slightly less than half the thickness of your workpiece. Position the rip fence so the distance between the far edge of the dado blade and the fence equals the width of the mating workpiece. After you cut the two mating pieces, check the fit; then sneak up to the perfect depth in succeeding cuts. (Like the tongue-and-groove joint, each adjustment doubles because it comes from both halves of the joint.)
